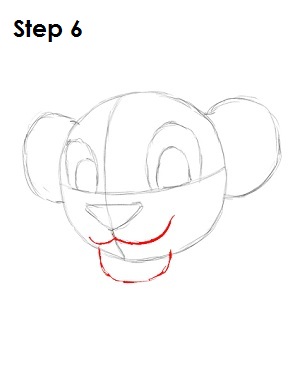
Step 6: Below Simba's nose draw two curves that start at the vertical construction line and go in opposite directions. Draw the curve on the right so it is bigger than the one on the left. This will be Simba's mouth. Draw an even bigger curve that sits below the main circle and his mouth. This will be Simba's chin.
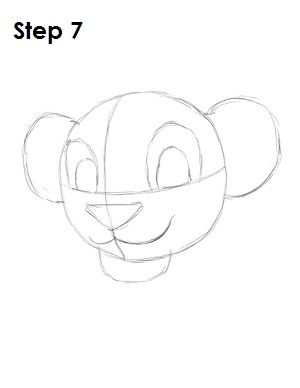
Step 7: That's it for the initial sketch of Simba from The Lion King! You have the basic Simba shape, so now you will go in and tighten your drawing. From this point on, press harder with your pencil in order to get darker lines and a more defined sketch.
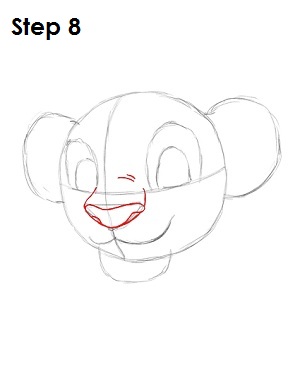
Step 8: Tighten the shape of Simba's nose by making the triangle more round and dip it downward in the middle of the top part. Draw two curves inside the two lower sides to create his nostrils and two lines coming up out of the top corners. On top of Simba's nose, draw two small wrinkles.
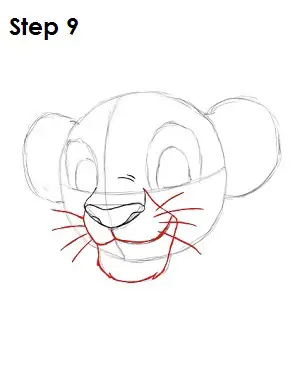
Step 9: Darken the shape of Simba's mouth, but draw it more jagged at the bottom part of his chin to represent his fur. Close the shape on the left and right sides to meet his nose. Draw four strokes on each side of Simba's mouth for his whiskers.
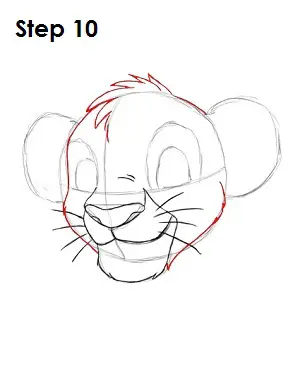
Step 10: Tighten the shape of Simba's head by giving him a few tufts of hair on top to represent his "mane." Taper in the left side of his face inward to the eye on the left. To give him his jaw on the left, make the line come out again, and then back in and down toward his mouth. Also draw in Simba's jaw on the right side. As you draw, make these lines a bit jagged to represent his fur.


